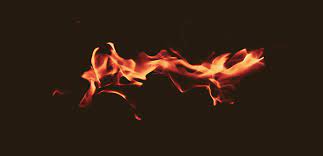
In the ever-evolving world of digital media, visual effects (VFX) have become a staple for creating immersive experiences. Among the various VFX elements, flame effects (Flame FX) are particularly popular for adding drama, excitement, or realism to projects ranging from films and video games to commercials and virtual reality experiences. However, integrating flame effects effectively can be a challenge, especially for those new to VFX. This step-by-step guide will help you integrate Flame FX into your next project seamlessly, ensuring high-quality results that captivate your audience.
Step 1: Plan Your Scene
Before diving into the technical aspects of Flame FX integration, it’s essential to plan your scene thoroughly. Determine where and how the flames will appear, considering factors like the light source, surrounding environment, and interaction with other elements in the scene. Understanding the context of the flames will help you make better choices in terms of placement, intensity, and motion, ensuring that the effect looks natural and enhances the overall narrative.
Step 2: Choose the Right Software
The next step is selecting the right software to create and integrate your Flame FX. Several powerful tools are available, each with its strengths:
-
Adobe After Effects: Known for its versatility, After Effects offers a range of plugins like Trapcode Particular or Video Copilot’s Saber for generating realistic flame effects.
-
Autodesk Maya: This 3D animation software is ideal for creating complex, realistic fire simulations. Its integrated Bifrost engine allows for advanced fluid dynamics, making it a top choice for high-end productions.
-
Blender: An open-source option, Blender is capable of creating stunning flame effects through its smoke and fire simulation tools. It’s particularly favored by independent artists and smaller studios due to its cost-effectiveness and robust features.
-
Houdini: If you need ultimate control over fire simulations, Houdini is the go-to software. It offers procedural generation of Flame FX, allowing for detailed customization and complex interactions.
Your choice of software will largely depend on the complexity of the effect you want to achieve, your budget, and your familiarity with the tool.
Step 3: Create the Flame Effect
Once you have chosen your software, it’s time to create the Flame FX. While the specifics will vary depending on the tool you are using, the following general steps apply:
-
Simulate the Fire: Begin by generating a basic flame simulation. In most software, this involves setting up an emitter that produces particles or fluid dynamics representing fire. Adjust parameters like temperature, density, and fuel to get the desired flame appearance.
-
Tweak the Simulation: Fine-tune your simulation by adjusting the size, speed, and turbulence of the flames. This step is crucial for making the fire look realistic and appropriate for your scene.
-
Add Shading and Lighting: To enhance the realism, add shading and adjust the lighting. Consider the light emitted by the flames and how it interacts with other objects in the scene. Many software options allow you to simulate the glow and flicker of firelight.
-
Render the Effect: Once satisfied with the simulation, render the flame effect. Rendering can be resource-intensive, so make sure your hardware is up to the task. Depending on your project, you might render the fire as a separate layer to composite later, giving you more flexibility in post-production.
Step 4: Integrate the Flame FX into Your Project
After creating and rendering your Flame FX, the next step is integration into your main project. This process involves several key steps:
-
Compositing: If you’ve rendered the flame as a separate element, use compositing software like Adobe After Effects or Nuke to combine it with your main footage. Pay attention to the blending modes to ensure the flames integrate seamlessly with the background.
-
Adjusting Colors: Match the color of the flames to the lighting of the scene. This may involve tweaking the hue, saturation, and brightness to ensure the flames don’t look out of place.
-
Adding Motion Blur: Flames in motion should have a slight blur to reflect their rapid movement. Most compositing software offers tools to add motion blur, which can enhance the realism of the effect.
-
Fine-Tuning: Once integrated, review the scene to identify any inconsistencies. Look for issues like unrealistic edges, incorrect light reflections, or unnatural interactions with other objects. Make the necessary adjustments until the effect looks natural.
Step 5: Render the Final Project
With the Flame FX integrated and fine-tuned, the final step is rendering your complete project. Depending on the complexity and length of your project, this could take some time. Ensure your settings are optimized for the best quality output while balancing render time and file size.
Conclusion
Integrating Flame FX into your project can significantly enhance its visual appeal, adding depth and excitement to your work. By following these steps—planning your scene, choosing the right software, creating and simulating the flame effect, and carefully integrating it into your project—you can achieve professional-quality results. Whether you’re a seasoned VFX artist or a beginner, this guide will help you master the art of flame effects and take your project to the next level.

Recurring revenue streams are changing how consumers experience brands.