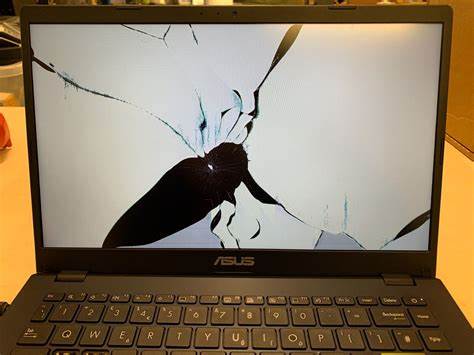
If your ASUS laptop screen is broken, cracked, or malfunctioning, repairing or replacing the screen is often more affordable than purchasing a new laptop. In this article, we will take you through a step-by-step process to Asus Screen repair, highlighting the tools you need, tips for purchasing the correct replacement, and how to ensure the repair is successful.
Table of Contents
Why Repairing Your ASUS Laptop Screen Makes Sense?
Tools You’ll Need for ASUS Screen Repair
Detailed Steps to Replace an ASUS Laptop Screen
Step 1: Power Off the Laptop
Step 2: Remove the Battery and Power Source
Step 3: Detach the Screen Bezel
Step 4: Disconnect and Remove the Broken Screen
Step 5: Install the New Screen
Step 6: Reassemble and Test the Laptop
Tips for Buying the Correct Replacement Screen
Testing Your ASUS Laptop After Screen Repair
Conclusion
1. Why Repairing Your ASUS Laptop Screen Makes Sense
Laptop screens are one of the most fragile parts of your device, often suffering from cracks, flickering issues, or even pixel burnout. Repairing the screen rather than replacing the entire device can save both time and money. If your ASUS laptop screen shows signs of physical damage, black spots, flickering, or lines, it’s time for a replacement.
By replacing the screen yourself, you avoid costly repair shop fees and can restore the functionality of your laptop without losing your personal data or settings.
2. Tools You’ll Need for ASUS Screen Repair
Before starting, ensure you have the following tools:
Phillips-head screwdriver (small size)
Plastic pry tool or guitar pick
Anti-static wrist strap (optional)
ASUS-compatible replacement screen (ensure the screen matches your laptop model)
Microfiber cloth or lint-free cloth (to clean the inside of the screen)
Clean, flat workspace
3. Detailed Steps to Replace an ASUS Laptop Screen
Step 1: Power Off the Laptop
Begin by shutting down your ASUS laptop. Press and hold the power button until the laptop is fully off. It’s important to turn off the laptop to prevent electrical damage and keep yourself safe.
Step 2: Remove the Battery and Power Source
Unplug the power adapter from the laptop. If your ASUS laptop has a removable battery, remove it by sliding the release latch. This step ensures no power is running through the laptop while you work on it.
Step 3: Detach the Screen Bezel
The bezel is the plastic frame surrounding the laptop screen. Use a small Phillips-head screwdriver to remove any screws securing the bezel. These screws are often located near the hinges or hidden under rubber covers, which can be removed using a plastic pry tool.
Once the screws are removed, use a plastic pry tool or guitar pick to gently work your way around the bezel, carefully popping it off without damaging the plastic clips.
Step 4: Disconnect and Remove the Broken Screen
With the bezel removed, you’ll have access to the damaged screen. The screen will be secured by screws at the sides or corners. Remove these screws, and carefully tilt the screen forward. You will see a thin cable (the video cable) attached to the back of the screen. Gently disconnect this cable by pulling on the connector, ensuring not to force it or damage the ribbon.
Step 5: Install the New Screen
Take your new ASUS screen and connect the video cable to the back of it, ensuring the connection is firm and secure. Once connected, position the new screen in the frame, aligning it with the screw holes. Secure the screen by tightening the screws you removed earlier.
Step 6: Reassemble and Test the Laptop
Now that the new screen is in place, reattach the bezel by snapping it back into position. If any screws secure the bezel, replace them. Finally, reinsert the battery (if removed) and plug in the power cable. Power on your laptop to test the new screen.
4. Tips for Buying the Correct Replacement Screen
When purchasing a replacement screen for your ASUS laptop, it’s crucial to ensure the replacement is compatible with your laptop model. Here’s what to look for:
Screen Size: Make sure the screen size matches your existing one (e.g., 13.3″, 15.6″, etc.).
Resolution: The screen’s resolution must match, such as 1366×768, 1920×1080, or higher.
Connector Type: Verify the number of pins on the ribbon connector, typically 30 or 40 pins.
Screen Type: Check whether your laptop has an LCD or LED screen and match the replacement accordingly.
It’s advisable to purchase from trusted suppliers or online retailers with return policies in case the screen is incompatible or defective.
5. Testing Your ASUS Laptop After Screen Repair
Once your Lenovo screen repair and reassembled, power on the laptop to ensure the new screen functions correctly. Look out for the following:
No flickering or distorted images
All pixels functioning without dead spots
Proper brightness and color display
If the screen isn’t functioning correctly , double-check the connection of the video cable and ensure the screen is properly seated.
6. Conclusion
Repairing an ASUS laptop screen on your own can seem intimidating, but by following these steps and taking your time, you can complete the repair successfully. A DIY screen replacement can save you both time and money, giving your laptop a new lease on life without having to rely on expensive professional repairs.
