When it comes to maintaining clean and safe water in your home, having a reliable filtration system is key. PVC cartridge filter housings are popular choices due to their durability, affordability, and ease of installation. In this guide, we will walk you through a step-by-step approach to installing a PVC cartridge filter housing, ensuring you get it right the first time. Whether you’re a DIY enthusiast or just looking to tackle a new project, these tips will help you achieve a successful installation.
Table of Contents
| Sr# | Headings |
|---|---|
| 1 | Understanding PVC Cartridge Filter Housing |
| 2 | Why Choose PVC for Filter Housings? |
| 3 | Tools and Materials Needed |
| 4 | Preparation Steps Before Installation |
| 5 | Step 1: Shutting Off the Water Supply |
| 6 | Step 2: Removing the Old Filter Housing |
| 7 | Step 3: Assembling the New PVC Filter Housing |
| 8 | Step 4: Installing the PVC Cartridge Filter Housing |
| 9 | Step 5: Testing for Leaks |
| 10 | Step 6: Finalizing the Installation |
| 11 | Maintenance Tips for Your Filter Housing |
| 12 | Troubleshooting Common Issues |
| 13 | When to Call a Professional |
| 14 | Benefits of Regular Filter Housing Maintenance |
| 15 | Conclusion |
Understanding PVC Cartridge Filter Housing
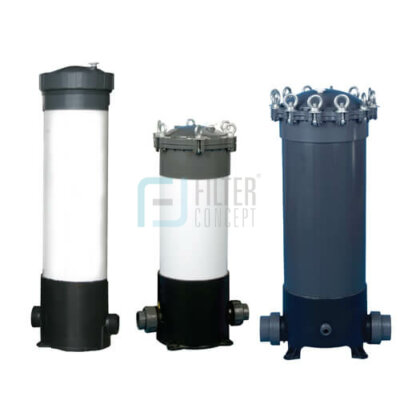
Before diving into the installation process, it’s important to understand what a PVC cartridge filter housing is. Essentially, this is a plastic container that holds a filter cartridge. Its primary role is to filter out impurities and contaminants from water. Think of it like a giant water bottle with a built-in strainer. The water flows through the filter, which captures unwanted particles, ensuring that you get clean, safe water.
Why Choose PVC for Filter Housings?
PVC, or Polyvinyl Chloride, is a type of plastic known for its strength and resistance to corrosion. Using PVC for filter housings is advantageous because it is both lightweight and durable. It doesn’t rust or corrode like metal options might, making it ideal for long-term use in various water conditions.
Tools and Materials Needed
Before you start, gather the following tools and materials:
- PVC cartridge filter housing kit
- Pipe wrenches
- Teflon tape
- PVC primer and cement
- New filter cartridge
- Safety gloves
- Bucket (for any water spillage)
Having these items ready will make the installation process smoother and more efficient.
Preparation Steps Before Installation
Proper preparation can save you a lot of trouble down the line. Here’s what you need to do:
- Read the Manual: Always start by reading the installation manual that comes with your filter housing. Different models might have specific instructions.
- Gather Information: Know the size and type of your current filter system. This ensures that the new PVC cartridge filter housing will fit correctly.
- Clear the Area: Make sure the installation area is clean and dry to avoid any mishaps.
Step 1: Shutting Off the Water Supply
First things first, you need to turn off the water supply. This prevents any mess or water wastage during the installation. Locate the main water valve in your home and turn it off. It’s always a good idea to open a faucet to drain any remaining water in the pipes.
Step 2: Removing the Old Filter Housing
With the water turned off, it’s time to remove the old filter housing. Use your pipe wrenches to unscrew it carefully. Keep a bucket underneath to catch any residual water. If you encounter any stubborn fittings, applying some gentle force can help.
Step 3: Assembling the New PVC Filter Housing
Now that you’ve removed the old housing, it’s time to prepare the new one. Begin by attaching the filter cartridge to the new PVC housing. Follow the manufacturer’s instructions for proper assembly. Be sure to use Teflon tape on the threads to ensure a watertight seal.
Step 4: Installing the PVC Cartridge Filter Housing
With the new filter housing assembled, position it where the old one was located. Secure it in place by threading it onto the existing pipes. Again, use your pipe wrenches to tighten it, but avoid over-tightening as this can damage the PVC.
Step 5: Testing for Leaks
Once everything is in place, it’s crucial to check for leaks. Turn the water supply back on slowly and inspect the connections. If you notice any drips or leaks, tighten the connections a bit more or reapply Teflon tape if needed.
Step 6: Finalizing the Installation
After ensuring there are no leaks, you can finalize the installation. Replace any covers or panels that were removed and clean up the area. Your new PVC cartridge filter housing should now be fully operational.
Maintenance Tips for Your Filter Housing
Regular maintenance is key to keeping your filter housing in top shape. Replace the filter cartridge as recommended by the manufacturer, and periodically check for any signs of wear or leaks. Cleaning the exterior of the housing and ensuring that all connections are secure will also help extend its lifespan.
Troubleshooting Common Issues
Even with the best installation, you might encounter some issues. Common problems include leaks, reduced water flow, or unusual noises. For leaks, check and tighten the connections. Reduced water flow might indicate a clogged filter cartridge, so replacing it should resolve the issue. If you hear unusual noises, inspect the installation to ensure everything is securely fastened.
When to Call a Professional
If you find yourself struggling with the installation or facing persistent issues, it might be time to call in a professional. Plumbers or filtration experts can provide assistance and ensure that everything is installed correctly.
Benefits of Regular Filter Housing Maintenance
Maintaining your filter housing not only extends its life but also ensures that you continue to get clean and safe water. Regular checks and timely replacements prevent larger issues and keep your water filtration system running smoothly.
Conclusion
Installing a PVC cartridge filter housing can be a straightforward task with the right tools and guidance. By following these steps, you can ensure that your filtration system is set up correctly and functioning efficiently. Remember to maintain your system regularly to keep it in top shape and to address any issues promptly.
FAQs
1. How often should I replace the filter cartridge in my PVC cartridge filter housing?
It’s generally recommended to replace the filter cartridge every 6 to 12 months, depending on your water quality and usage.
2. Can I install a PVC cartridge filter housing myself, or should I hire a professional?
You can install it yourself if you’re comfortable with DIY tasks. However, if you encounter difficulties, hiring a professional might be a good idea.
3. What should I do if I notice a leak after installation?
Check all connections and tighten them if necessary. If the leak persists, reapply Teflon tape or consult a professional for further assistance.
4. How do I know if the filter cartridge needs replacing?
Signs include reduced water flow, unusual tastes or odors in the water, or visible discoloration of the cartridge.
5. Is PVC the best material for filter housings?
PVC is a popular choice due to its durability and resistance to corrosion, but other materials like stainless steel are also available depending on your needs and budget.